How to set-up your Google Business profile

Google Business Profile (formerly known as Google My Business) is one of the most effective tools for marketers to use when working with local businesses. Without GBP, businesses are unable to feature in the Local Pack or Local Finder, which should be a key goal for businesses of this nature. Creating a Google Business Profile for your business, or the local businesses that you’re working with, is an essential first step towards SEO success. Setting this up properly is critical, so this comprehensive guide will show you the best way to set up a Google Business Profile.

Learn how

1. Create a Business Google Account

Before you can create a Google local listing, you’ll need to create a Google Account. Google Accounts are available to everybody and are simple to use. You can either use an existing email to set up your Google Account or you can make a new one. Visit 'accounts.google.com' and select ‘Create an account’ to get started.

2. Visit the Google Business Profile Gateway

Once you have your new email address, head to google.com/business and click ‘Manage now’ to get started:

3. Look for the Business

Begin by typing in the business name to see if a profile with this name already exists. If it does, then you’ll see it appear as you’re typing. If the business name doesn’t appear, then go ahead and click ‘Add your business to Google’.

Requesting Access to an Existing Business Profile

If someone has already created a Google Business Profile for the business, then don’t worry. You can request that management of the profile be handed over to you. Simply click ‘Request Access’ and you’ll be guided through the process.

4. Add the Business Name and Category

If you’re creating a new profile, then the next step is to add the business name and category. The name that you use here should exactly match the official business name. Don’t be tempted to add any keywords into the name as this violates Google’s guidelines. Next, choose the category that most closely matches the business. You’ll have the option to edit this within the profile later, as well as to add additional categories, so don’t worry if you’re not completely sure what to select right now. For guidance, check out our advice for local businesses on how to choose the best GBP categories.

5. Does the business have a physical location?

If the business has a physical location that customers can visit for face-to-face interactions, then you’ll now need to share this information. If this is the case, then select ‘Yes’ and click ‘Next’. If the business only operates online, or has a physical location but doesn’t receive customers in person, then select ‘No’ instead.

6. Enter the Business Location

If the business has a physical location, then you can now provide the address. You might be asked to position a pin on a map to confirm the location. It’s important that the address you give is accurate and complete to prevent any confusion to customers or issues with the verification process.

7. Does the business provide home deliveries or services?

If this is a service-area business, or if the business delivers items to customers at home, then select ‘Yes’ on the next step.
If you select ‘Yes’ then you’ll need to enter the areas that the business serves or delivers to. You’ll be able to come back and edit this information later, and you’ll be able to add new locations any time the business expands.

8. Add Contact Details

The next step is to add the contact details for the business. You’ll need to enter the phone number, and you also have the option to add the business website. If the business doesn’t have a website, then tick the box on this page.

If a website is later created, you’ll be able to add this information then.

As an agency setting up GBP for a client, you’ll need to enter the client’s contact details, not your own. It’s a good idea to communicate clearly to your client that they’ll be contacted by Google for the verification process, which we’ll explore shortly.

9. Stay in the Know

Before you move on to verifying the business, you’ll be asked if you’d like to receive helpful tips and recommendations from Google. Although there’s no obligation, you might find it beneficial to receive this information.

10. Verify the Business

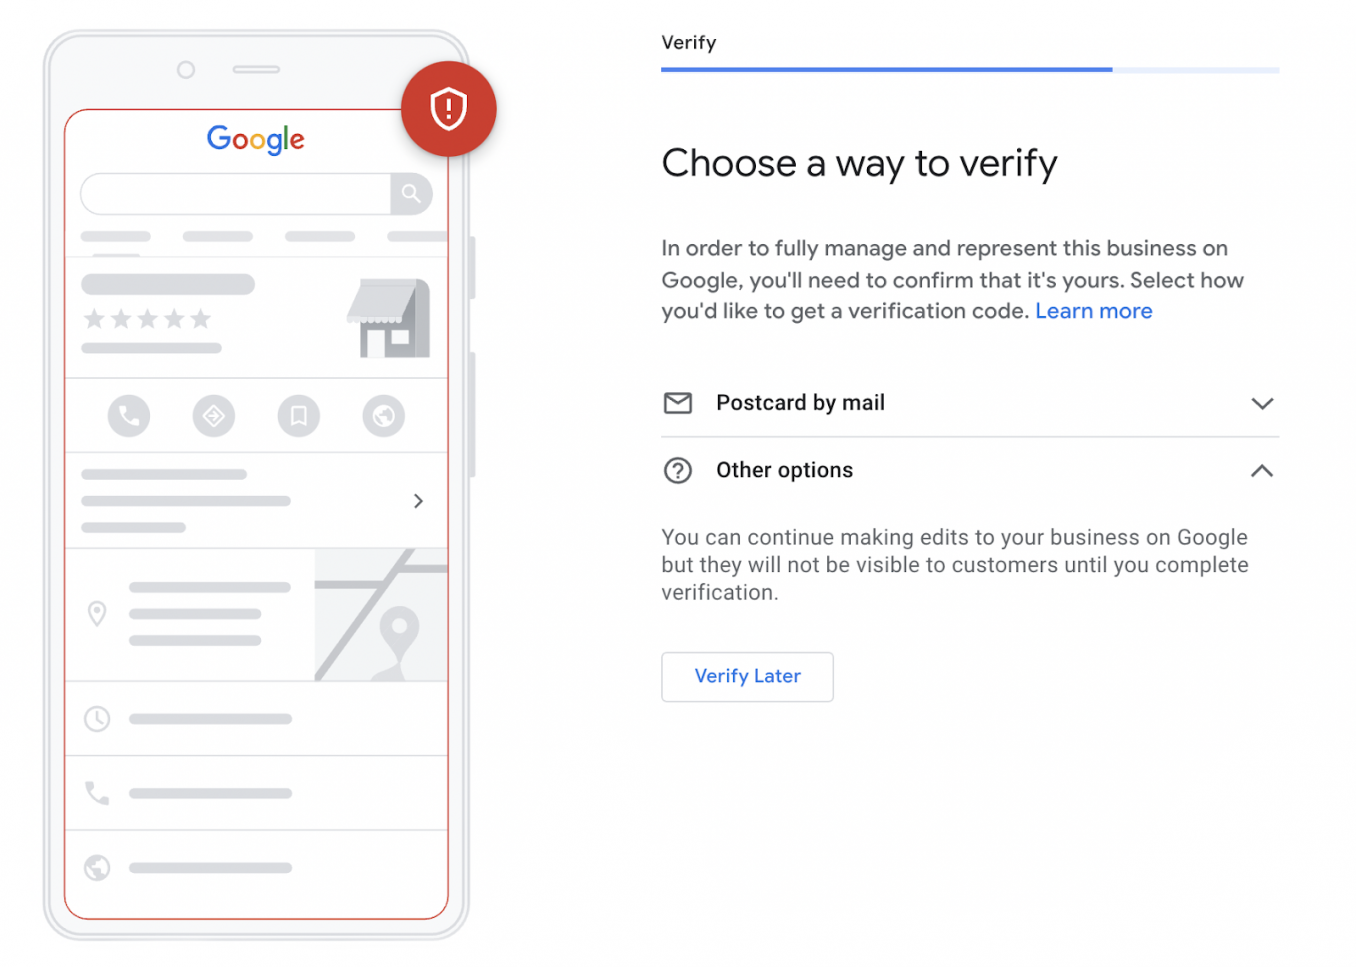
In this step, you’ll be required to choose a verification method to prove the business is operating at the specified address. Receiving a postcard by mail to the business address is the most common route for verification, but you might also have the option to do so via phone or email.


Postcard Verification

This type of verification is available to all businesses. A postcard will be sent to the business address and will usually arrive within five days.

The postcard will contain a code that must be entered into the appropriate place within the GBP account. If you don’t receive the postcard, then you can request a replacement.


Phone verification

Some businesses will be able to verify their accounts over the phone, but this option isn’t available to everyone. If you’re eligible, then you’ll see this option on the verification page.

If you decide to use this method, then you’ll receive a code via an automated phone call.

Email Verification

As with phone verification, the email alternative isn’t available to everyone.

If you do have the option to verify by email, then you can request a code to your inbox. This will only be possible to the email address connected to the GBP account.

11. Add Your Business Hours

Adding your business hours is essential so that potential customers know when they can visit or contact you. It’s imperative that the hours you specify are accurate, and you should always edit this information if your opening hours change—whether permanently or temporarily.
There are several reasons why your hours of operation may temporarily change, such as public holidays or staff illness. In these cases, it’s a good idea to let your customers know. For more information on why this is important and how to do it with ease, check out our guide to managing opening hours in Google Business Profile.

12. Add Messaging

Accepting messages from potential customers within GBP is a great way to connect with your audience and drive sales. However, you should only enable this function if you can commit to managing it consistently. Being unresponsive to messages will create a poor user experience and could harm your business reputation.
If you do wish to accept messages, then simply click the button. You can come back and pause or disable this feature at any point.

13. Add the Business Description

Providing a description of the business will help consumers to know what it’s all about and whether it’s a good fit for their needs. You can write up to 750 characters within this section, so be sure to use this opportunity to put the most important information across in a clear and concise way.

14. Add Photos

Adding photos is a fantastic way to help searchers visualize the business and to get a glimpse of the brand. Customers can add their own photos to the listing, and some people will choose to do this when leaving you a Google review. Be aware that you won’t have any control over the order in which photos appear on your listing, so it’s a good idea to have several of your own photos mixed in with the user-generated content. Make sure you showcase different aspects of your products and services, as well as different areas of your physical location.

Optimize Your Google Business Profile

Once your listing is good to go, then it’s time to consider how best to optimize GBP. Some essential ongoing tasks include:
  • Adding new photos and videos
  • Using Google Business Profile Q&A to connect with your audience and answer their questions
  • Creating Google Business Profile Posts to showcase offers and promotions
  • Listing your services, products, or menu items
  • Encouraging your customers to ‘Follow’ you on Google Maps
  • Requesting Google reviews using Zidy Review Invite feature

Your Google Business profile is all set!

Back Top